Orientation


About our Learning Management System (LMS)
Get acquainted with our learning platform in this quick orientation and gain access to all the information and resources you'll need to succeed in your studies.

What you need to know about assessments
Explore our assessment types and receive guidance on completing them, including tips on avoiding plagiarism. Learn about the submission process for units and understand what to expect during the marking phase.
Clinic to Cloud
Find information on the Clinic to Cloud Medical software here.
Learning Management System
Catapult is the official learning management system for Medical Administration Training (MAT).
Our LMS, or learning management system, is a software tool that allows you to access your learning resources, complete assessments, communicate with your trainer and track your progress.
LOGGING IN TO THE LMS FOR THE FIRST TIME
Welcome aboard!
Once you’ve enrolled in your course, keep an eye out for a welcome email arriving in your inbox (don’t forget to check your junk mail folder just in case!). This email will come from noreply@catapult.com.au and holds the key to unlocking your Learning Management System (LMS) and embarking on your learning journey.
The welcome email will guide you through activating your user account and creating a secure password. To make this process even smoother, we’ve created a helpful video tutorial that walks you through each step. https://vimeo.com/354140384/07f1bd470d

ACCESSING THE LMS
For quick and easy access to your learning and assessment materials, bookmark this link: https://mat.learnlogin.com.au/ . You can also log in through “Student Login” on our website.

(View enlarged image here)
CAN'T REMEMBER YOUR LMS PASSWORD?
We all forget passwords sometimes, so don’t worry if you’re locked out of the MAT Learning Management System (LMS). Resetting your password is quick and easy!
Just follow these simple steps:
Open your web browser and visit the MAT Learning Management System login page: https://mat.learnlogin.com.au/
Click “Forgot your password?”: You’ll see a link labelled “Forgot your password?” right below the login button. Click on it.
Important note: Your username for the LMS is not your email address. It’s usually a unique identifier assigned to you by us. If you’re unsure what your username is, visit the original welcome email or contact us for assistance.
Once you enter your username and click “Submit”, you’ll receive an email with instructions on how to reset your password. The email will typically contain a link that you can click to create a new password.
Tips:
Be sure to check your spam or junk mail folder if you don’t see the password reset email in your inbox after a few minutes.
If you’re still having trouble resetting your password, contact us for help.
HOW TO VIEW YOUR LEARNING RESOURCE IN THE LMS
With your LMS account up and running, you’re all set to explore online learning!
Watch this quick video to discover how to easily access and dive into your learning materials. Click here.
HOW TO ACCESS YOUR ASSESSMENT IN THE LMS
Discover how to easily complete assessments, view the PDF here.
How to check and send your messages
The Learning Management System (LMS) features an integrated messaging system, enabling communication with trainers. This tool proves beneficial for seeking assistance outside regular office hours. If you prefer email communication, you can always send an email to support@medtrain.com.au.
To access messages, click the dropdown blue icon at the top right corner of the LMS labelled ‘Logged in as…’, then select ‘Messages’. Within the messaging interface, you can navigate through:
- Inbox
- Sent Box
- Trash
You will also see the New Message icon. To compose a new message, select the ‘New Message’ icon, input the first two letters of the recipient’s name in the search field, fill in all required fields, and click ‘Send’.
CHANGING YOUR CONTACT DETAILS IN THE LMS
Please notify us as soon as possible of any changes to your contact details (address, email or phone). Please note that updating your contact information in the LMS does not update on your student file so you will need to advise us either in email or by calling.
What you need to know about assessments
Staying on top of your deadlines
Medical Administration Training (MAT) is committed to providing high-quality training to learners, and to ensuring that all learners are able to successfully progress through their studies. MAT applies academic progression requirements in order to ensure that learners are provided with the necessary support to complete their studies and demonstrate satisfactory academic progress to advance through their chosen course. To view the Course Progression Policy Click here.
Ensuring you stay on top of your deadlines is essential for a smooth course journey.
Remember, each assessment has a specific due date. Make sure you check it carefully when you open an assessment. It’s displayed prominently at the top of the screen, right below the unit code and name.

(View enlarged image here)
Students completing a full certificate or Diploma
Students undertaking a full certificate or diploma program (excluding short courses) have access to a dedicated student portal. Within this portal, you’ll find essential information such as enrolment details, invoices, and a training schedule that clearly outlines the proposed start and end dates for each unit. While each course has a predefined duration, there’s flexibility for students to complete it sooner if desired.
Your learning and assessment activities are facilitated through the Learning Management System (LMS). In the LMS, units are systematically uploaded one at a time to your Dashboard. Upon successful completion of the current unit, the next one unlocks within the next business day, ensuring a seamless and structured progression through your coursework.
Students completing a short course
For students enrolled in short courses, access to a student portal is not provided. Instead, upon commencing your course, you’ll receive a confirmation of enrolment letter specifying the course end date. Despite each course having a set duration, there is flexibility for students to complete it earlier if they choose.
In the case of most short courses, all units are readily available on your Dashboard in the Learning Management System (LMS) upon enrolment. This immediate accessibility ensures a straightforward and efficient progression through your course.
Plagiarism and how to avoid it
As a student you need to understand plagiarism, recognise when it happens in your own written work and know how to acknowledge the work of others correctly.
Put simply, If you use another person’s work or words without full acknowledgement, you are plagiarising. See our Plagiarism policy here.
Plagiarism should not be considered a minor form of cheating as it is a breach of academic integrity.
Using another’s work as your own is bad practice, it means that you have failed to complete the learning process. Intentional plagiarism is unethical and undermines the standards of Medical Administration Training and its qualifications.
Medical Administration Training takes plagiarism very seriously and it will not be tolerated. Plagiarism that is identified within a student’s assessment may lead to cancellation of their enrolment with no refund.
- Copying and pasting text directly from external websites or other sources not provided by Medical Administration Training.
- Sharing assessment questions or answers with other students.
- Using Artificial Intelligence (AI), such as ChatGPT, to answer assessment questions.
- Submitting work completed by another person or copying directly from another student.
- Submitting work purchased from online sources or ghostwriters.
- Engaging with illegal cheating services.
Avoiding plagiarism is crucial as it constitutes a serious academic offence. MAT trainers employ various tools to detect copied work, underlining the significance of maintaining originality.
To prevent plagiarism, follow these guidelines:
- Utilise the learner resources provided by Medical Administration Training whenever possible.
- Avoid using cheating services and ensure that all assessments are completed solely by yourself.
- Instead of directly copying information, contribute your unique perspective or interpretation to the content.
- When referencing external ideas or information, include proper citations to acknowledge the source.
- Do not submit assessments generated by Artificial Intelligence, as plagiarism checkers will easily detect such content.
Exploring Assessment Types and how to complete them
Each assessment comes with specific instructions. Be sure to read them carefully to understand what’s expected and minimise unnecessary resubmissions.
Within your course, you may encounter a variety of assessment tasks, such as:
- Written Responses: Answer questions thoughtfully and in your own words.
- Video/Voice Recordings: This allows you to showcase practical skills or competencies that are better communicated through visual or auditory means.
- File Attachments: Include completed documents, screenshots, or photo evidence to illustrate your work.
- Interactive Activities: Participate in role-plays and exercises to put your learning into practice.
Note: All assessments must be completed inside our LMS.
When answering questions, take the time to provide thoughtful responses using your own language. This involves explaining concepts based on your understanding rather than copying directly from sources. For more information, consult our plagiarism guidelines.
Prioritise quality over quantity. Your trainer can tell if you’re adding too much unnecessary information or talking about things unrelated to the main point. Stick to the key points you need to discuss. Dive deeper only when necessary and avoid adding extra information if it’s not needed.
Most of our assessments will require you to supply written responses and may use a range of ‘instructional words’, such as ‘identify’ or ‘explain’. These words will guide you as to how you should answer the question. Some questions will also tell you how many answers you need to give – for example, ‘Describe three strategies…’.
The following list will help you to provide correct responses:
Analyse – when a question asks you to ‘analyse’, you should do so in detail, identifying important points and key features. Generally, you are expected to write a response of one to two paragraphs in length.
Compare – when a question asks you to ‘compare’, you will need to show how two or more things are similar, ensuring you also indicate the relevance of the consequences. Generally, you are expected to write a response of one or two paragraphs in length.
Contrast – when a question asks you to ‘contrast’, you will need to show how two or more things are different, ensuring you indicate the relevance or the consequences. Generally, you are expected to write a response of one or two paragraphs in length.
Describe – when a question asks you to ‘describe’, you will need to state the most noticeable qualities or features. Generally, you are expected to write a response of two or three sentences in length.
Discuss – when a question asks you to ‘discuss’, you are required to point out important issues or features and express some form of critical judgment. Generally, you are expected to write a response of one or two paragraphs in length.
Evaluate – when a question asks you to ‘evaluate’, you should do so by putting forward arguments for and against something. Generally, you are expected to write a response of one or two paragraphs in length.
Examine – when a question asks you to ‘examine’, this is similar to ‘analyse’. You will need to provide a detailed response with key points and features and provide a critical analysis. Generally, you are expected to write a response of one or two paragraphs in length.
Explain – when a question asks you to ‘explain’, you will need to make clear how or why something happened or the way it is. Generally, you are expected to write a response of two or three sentences in length.
Identify – when a question asks you to ‘identify’, you will need to briefly describe the required information. Generally, you are expected to write a response of two or three sentences in length.
List – when a question asks you to ‘list’, this means you will need to briefly state information in a list format, often with a specific number of items indicated.
Outline – when a question asks you to ‘outline’, this means giving only the main points. Generally, you are expected to write a response of two or three sentences in length.
Summarise – when a question asks you to ‘summarise’, this is similar to ‘outline’, only giving the main points. Generally, you are expected to write a response of two or three sentences in length.
For some assessments, you’ll need to submit video or audio recordings to demonstrate your skills. Here’s how you can do it:
Before starting your recording, keep in mind that a video or audio file exceeding 2GB will necessitate the use of a file sharing service.
Here’s what you should do:
- Set a Time Limit: Determine the desired duration for your recording and adhere to it. Shorter recordings typically result in smaller file sizes.
- Consider Multiple Videos: If you need a longer duration, contemplate creating a series of shorter videos. Breaking the content into manageable segments can help keep file sizes within the desired limits.
Record directly: If your device has a camera and microphone, you can record directly within the LMS. On the relevant question, click Record Video and follow the prompts.
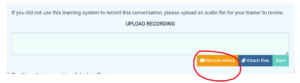
(View enlarged image here)
Once the camera opens click the red circle to begin the recording. To stop click the red square.

(View enlarged image here)
Upload existing recordings: If you prefer to record elsewhere (e.g., phone, separate recorder), you can upload those files to the assessment after recording using the attach files feature.
Note: Prior to recording a video on your smartphone device, if you are concerned about file size limits you can make the resolution of your video a lower quality. You can do this under the camera setting. Go to record video or video (depending on your phone platform) and reduce the resolution from High Definition to a lower resolution, this can be done in the settings tab.
General Tips:
Script your content: Before recording, write and practice a script to ensure you cover all required points clearly and concisely.
Practice your delivery: Rehearse your recording beforehand to sound confident and polished.
File sharing – Large video and audio recordings
If you encounter difficulty uploading large video or audio files for your assessment due to their size, there are several options to consider:
Rerecording: For files exceeding 2GB, splitting them into shorter segments or creating multiple smaller videos could be a solution.
File Compression: Utilise video compression tools available for your PC to reduce file sizes without compromising quality. Some recommended tools include:
- Any Video Converter
- VLC Media Player
- Handbrake
- Clipchamp
- MiroVideoConverter
- Shutter Encoder
- Movavi Video Converter
- Freemake Video Converter
- VSDC Video Converter
- VideoSolo Video Converter
Cloud Services: Various cloud platforms offer free sign-up trials with limited file upload capacities, typically up to 2GB. Popular options include:
If you require assistance setting up a Dropbox folder, please email support@medtrain.com.au.
Remember to name your files with your full name and assessment task number for easy identification. Additionally, when submitting your assessment, indicate the method you used to upload your video so your trainer can locate it efficiently.
Steps to Attach Files:
Complete the Task: Ensure you’ve finished the task thoroughly before attaching any files.
Double-check for Accuracy: Carefully review your work for any errors or omissions.
Upload to the LMS: Use the “Attach Files” feature within the LMS to upload your document.
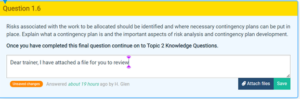
(view enlarged image here)
Verify Correct Attachment: Before submitting, double-check that you’ve attached the intended document.
Additional Tips:
File Naming: Use clear and descriptive filenames to easily identify your documents.
File Formats: Confirm that the LMS accepts the file format you’re using.
File Size Limits: Be mindful of any file size restrictions within the LMS.
Multiple Files: If required, attach multiple files in a single submission.
By following these steps, you can ensure your files are submitted correctly and securely within the LMS.
Role-play assessments can seem daunting, especially when recording yourself is involved. Overcoming the fear of recording can be achieved by acknowledging its purpose as a valuable learning and assessment tool. Keep in mind that it’s an opportunity to showcase your skills and apply theoretical knowledge in a practical context. To ease this anxiety, consider the following tips:
Overcoming Recording Apprehension:
View the recording as a chance to enhance your skills and receive constructive feedback rather than as a judgment of your performance.
Familiarise yourself with the recording equipment and process. Practice recording short segments to build confidence before the actual assessment.
Recognise that everyone has areas for improvement. Use the recording as an opportunity for self-reflection and growth rather than as a platform for self-criticism.
Now, let’s enhance the original guidance with additional points:
- Review Assessment Instructions: Start by carefully reading the assessment instructions. Understand the specific scenario, objectives, and expectations for the role play. If possible, conduct role plays in a workplace setting or simulate the environment closely.
- Character Background: Develop a comprehensive understanding of your assigned role. Include details like background information, personality traits, and specifics relevant to the scenario.
- Scenario Context: Familiarise yourself with the context of the role-play scenario, understanding the setting, circumstances, and any unique elements that may influence your role.
- Objectives and Goals: Determine the objectives or goals of the role play. Identify desired outcomes and expected actions or decisions from each participant.
- Communication Style: Tailor your communication style to your role. Consider tone, language, and overall approach to effectively portray your assigned character.
- Effective Communication: Speak clearly, actively listen, and respond coherently to maintain your character and contribute meaningfully to the role play.
- Body Language and Props: Incorporate suitable body language, props, and, if required, personal protective equipment (PPE) to elevate the authenticity of your role play, creating a more immersive and engaging experience. Ensure that your body language aligns with your character by maintaining eye contact, employing gestures, and conveying non-verbal cues, all of which contribute to a realistic portrayal within the role-play scenario.
- Sitting or Standing: Consider the dynamics of your role play. If appropriate, choose whether to sit or stand based on the context and the character you are portraying. This decision can influence your body language and overall presence.
- Active Engagement: Actively participate with others in the role-play. Remain attentive, responsive, and contribute to the unfolding scenario.
- Problem-Solving Skills: Be prepared to demonstrate problem-solving skills within the context of the role-play. Address challenges, make decisions, and adapt to changing circumstances as needed.
- Arrange and Inform Others: If others are assisting you in the role-play, ensure they are informed and prepared. Coordinate and communicate with them beforehand for a smooth and coordinated performance.
- Practice Before Recording: Before recording, practice the role-play. Experiment with different approaches and responses as needed.
- Record the Role Play: Ensure that the content aligns with any assessment paperwork requiring completion. This cohesive approach guarantees a well-executed and effective role-play.
When is the best time to complete your assessment?
The ideal time to tackle your assessments depends on several factors:
Before diving into the assessment, make sure you’ve thoroughly reviewed all the learning content and reviewed your study notes and other resources.
Feeling confident in your understanding of the key concepts is crucial for a successful assessment experience.
Some assessments involve the practical application of your knowledge in software systems. Therefore, before encountering the actual assessment, it’s highly recommended to engage in thorough practice sessions. Familiarise yourself with the intricacies of the software, refine your skills, and ensure a solid grasp of the concepts involved. This proactive approach not only enhances your confidence but also positions you for success when tackling the real assessment. Remember, practice makes perfect, and the more you immerse yourself in hands-on exercises, the more adept you’ll become in demonstrating your proficiency during assessments.
Choose a time to complete your assessment when you feel:
- Mentally alert and focused.
- Free from distractions and interruptions.
- Have enough time to complete the assessment thoroughly.
Remember, rushing through an assessment can lead to careless mistakes. So, pick a time and place that allows you to give your best effort.
Do I have to complete each assessment in one go, or can I leave and come back to it?
Take your time! Our assessments are flexible and untimed, so you can work at your own pace. Need a break? No problem! Just save your progress and come back later to pick up where you left off.
Submitting your assessments
Before clicking red ‘Submit’ button (located at the top right of screen), ensure you’ve covered all aspects of your assessment:
- Navigate to the assessment tab in the side menu bar. Confirm completion of all sections; completed questions will be highlighted in yellow.
- Review for Unanswered Questions: After hitting the submit button, check the declaration box for any questions you might have missed. If you notice 1-2 unanswered questions, these may pertain to student instructions or feedback in your assessment and it is OK to submit. However, if you find more unanswered questions, revisit your assessment and ensure you complete them before submitting.
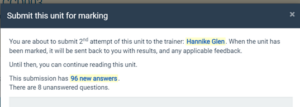
(View enlarged image here)
After submission, the unit will be temporarily locked until your trainer completes the marking process. You can track its status on your dashboard.
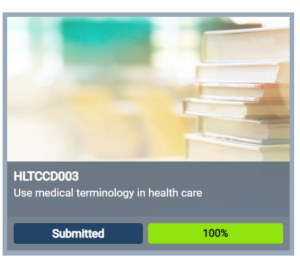
(View enlarged image here)
How are assessments marked?
Assessments operate on a competency-based model, focusing on demonstrating a level of competence across all activities and tasks rather than specific grading. Multiple assessors may be involved throughout your course, each assigned to evaluate specific units.
While our policy allows up to 10 days for marking, our usual practice ensures a swift turnaround, often providing feedback within a day or two. Assessors carefully confirm that assessments reflect your own work. You have three attempts at each assessment, with your assessor offering valuable feedback to aid your improvement.
Assessments are marked either as “Competent” or “Not Yet Competent.”
“Competent” signifies that everything was well done, with no corrections or further information required. Your trainer marks you as complete.
“Not Yet Competent” indicates that corrections are required, and you need to attempt some sections of the assessment again.
What happens once your assessment is marked
Competent Marking: If your assessment is marked as competent on the initial submission it will disappear from your dashboard, and the unit will move to Finalised Enrolments. It can then be accessed through the ‘Click here to access Finalised Enrolments.’ button on your dashboard.
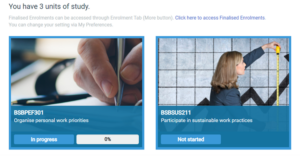
(View enlarged image here)
Expect an emailed marking transcript, and your next unit will be uploaded the next business day.
Not Yet Competent Marking: If your assessment receives a ‘Not Yet Competent’ mark, it will be sent back to your dashboard along with feedback from your trainer. This is a standard practice and provides an opportunity for reflection and learning. Take time to review the feedback, and if you have any uncertainties, don’t hesitate to seek clarification from your trainer. Typically, you are given up to 7 days to make the necessary corrections, depending on the assessment’s due date.
Go to your dashboard; the unit will display feedback from your trainer.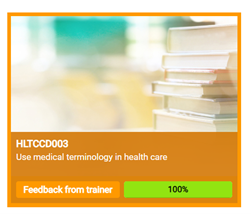
(View enlarged image here)
Open the unit and click on ‘continue working’.
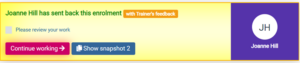
(View enlarged image here)
Questions marked green indicate that they have been marked as satisfactory and no further action is required.
Red sections have been marked not yet satisfactory. Read the trainer’s comments, make the required corrections, and save.
NOTE: For written responses, you can type over the original text and then press save.
Once all corrections are made, resubmit the unit by clicking on ‘submit’ at the top of the page.
How many assessment attempts do I get?
Generally, students are provided with up to three attempts at assessment.
When are certificates issued?
Certificates are issued once you successfully finish your coursework and settle all outstanding fees. You can expect to receive a Certificate or Statement of Attainment via email within three business days after completing the requirements. It is a policy requirement for the Registered Training Organisation (RTO) to issue the certificate within 30 calendar days of confirming that you have met all the necessary course requirements.
Please notify us as soon as possible of any changes to your contact details (address, email or phone). Please note that updating your contact information in the LMS does not update your student file so you will need to advise us either by email or by calling our office.
Clinic to Cloud
What is Clinic to Cloud?
Clinic to Cloud is a cloud-based medical practice management software designed to help healthcare professionals streamline their operations and improve patient care. It offers a comprehensive suite of features that cater to various aspects of running a clinic.
Why do I need access to Clinic to Cloud Medical Software?
Access to Clinic to Cloud Medical Software is necessary for students undertaking subjects that involve the preparation and processing of medical accounts. This access allows students to practice using the software and perform tasks required for their assessments.
When should I access Clinic to Cloud?
You should access Clinic to Cloud software only when instructed to do so in your learning resources or when completing assessment tasks that require its use.
How do I get access to my Clinic to Cloud?
Once the relevant subject is issued to the LMS dashboard, you’ll receive an email from noreply@clinictocloud.com.au (check your junk/spam folder if you haven’t received it) with a temporary password. You have 7 days to set your new password. If you don’t receive the email or you run out of time, you can reset your password on the login page here: https://www.clinictocloud.com.au/Login and click on the ‘forgot password’ hyperlink.
Note: Re-type the temporary password into the new password box, don’t copy and paste the temporary password as it sometimes has an error.
For further assistance, call 1300 887 082 or email support@medtrain.com.au.
How do I use the Clinic to Cloud software?
You will find the Clinic to Cloud tutorial in your learning resource. Please download this to your computer.
The tutorial provides step-by-step instructions on how to use Clinic to Cloud. Ensure you watch the videos, read the information and practice each of the tasks. It is very important that when you are completing your assessment tasks, you follow the instructions in the tutorial closely.
How long will I have access to Clinic to Cloud?
You will have access until your course is completed.
Need Advice?
Need some study support?
We’re committed to ensuring you have a positive online learning experience, that’s why we have a study support program that fits your needs.
Visit our study support page https://medtrain.com.au/study-support/
Need some Wellbeing & Accessability Support
MAT has a range of wellbeing and AccessAbility support ensuring all students have equal opportunities.
Visit our Wellbeing and AccessAbility page: https://medtrain.com.au/wellbeing-and-accessability/